空ブックの作成
1.Excelを起動する。
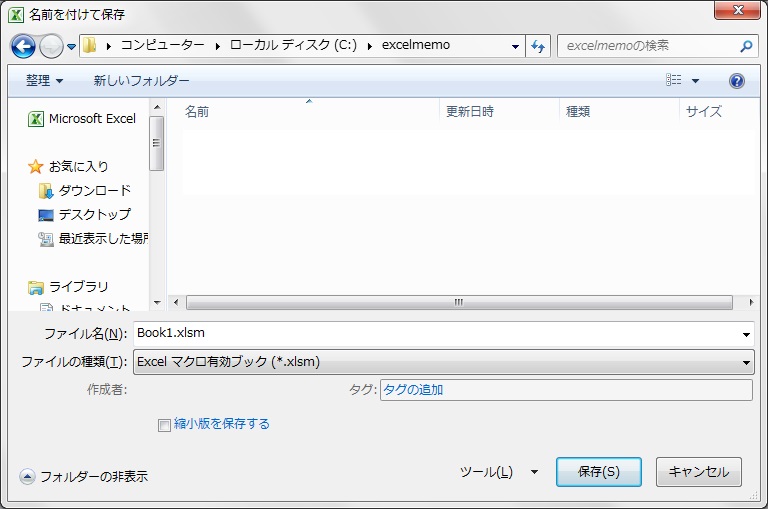
2.保存
何もせず、任意のファイル名で「Excel マクロ有効ブック (*.xlsm)」を指定して保存し、閉じる。(ここでは「Book1.xlsm」とする。)
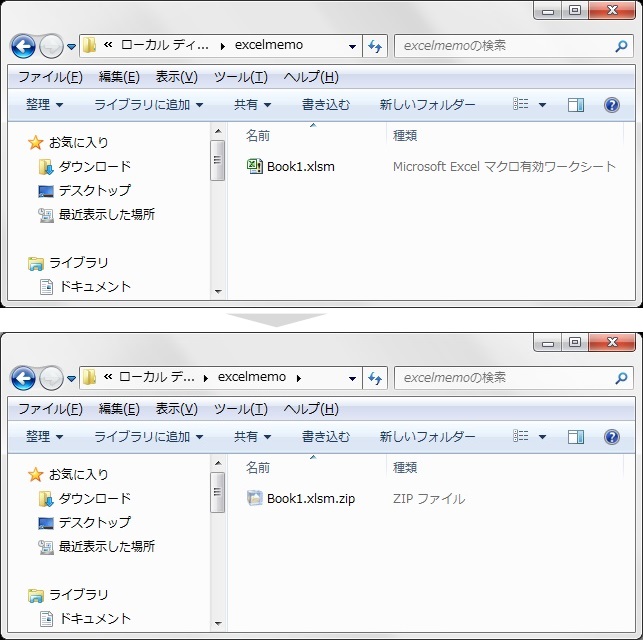
ZIPファイルへ変更する
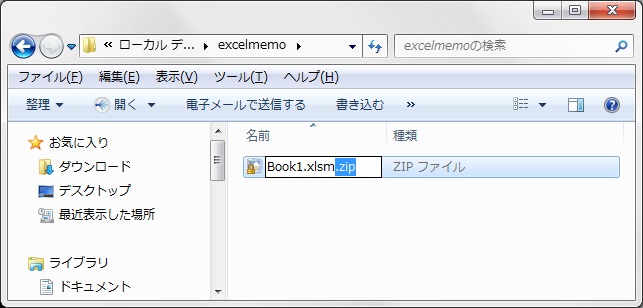
「Book1.xlsm」を「Book1.xlsm.zip」へリネーム。(拡張子を変更)
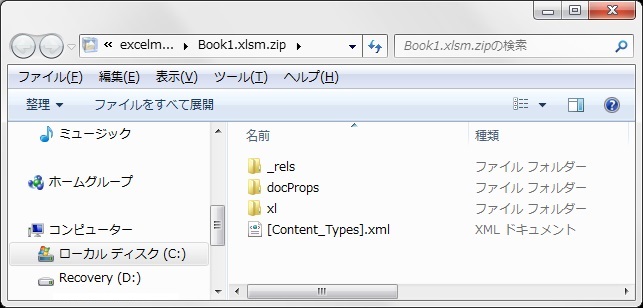
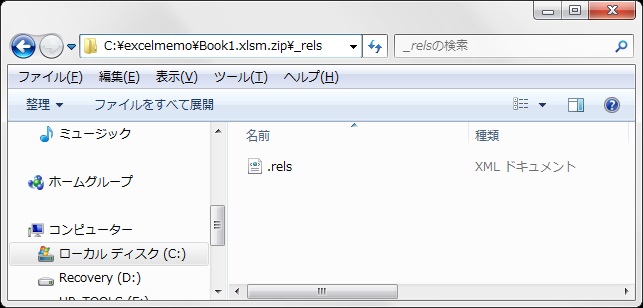
ZIPファイルを開く
「Book1.xlsm.zip」を右クリック、「プログラムから開く(H)」-「エクスプローラー」を選択。
「.rels」を編集する
1.「.rels」をコピー
<Book1.xlsm.zip\_rels\.rels>をワークフォルダへコピーする。(ここでは<C:\work>直下にコピーしています。)

2.テキストエディタで編集
メモ帳で開く。(右クリックから「編集(E)」を選択。)
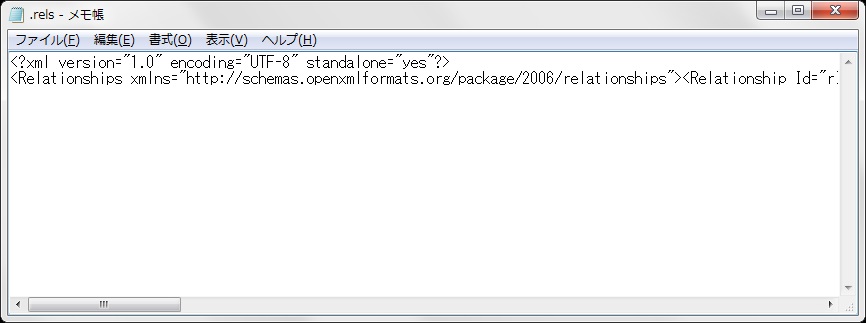
3.「.rels」にコードを追記
Relationshipsタグを1行追記する。(赤文字部分が追記箇所)
<?xml version=”1.0″ encoding=”UTF-8″ standalone=”yes”?>
<Relationships xmlns=”http://schemas.openxmlformats.org/package/2006/relationships”>
<Relationship Id=”rId3″ Type=”http://schemas.openxmlformats.org/officeDocument/2006/relationships/extended-properties” Target=”docProps/app.xml”/>
<Relationship Id=”rId2″ Type=”http://schemas.openxmlformats.org/package/2006/relationships/metadata/core-properties” Target=”docProps/core.xml”/>
<Relationship Id=”rId1″ Type=”http://schemas.openxmlformats.org/officeDocument/2006/relationships/officeDocument” Target=”xl/workbook.xml”/>
<Relationship Type=”http://schemas.microsoft.com/office/2006/relationships/ui/extensibility” Target=”/customUI/customUI.xml” Id=”customUIRelID” />
</Relationships>
4.「.rels」の上書き
保存して元のファイル<Book1.xlsm.zip\_rels\.rels>に上書き。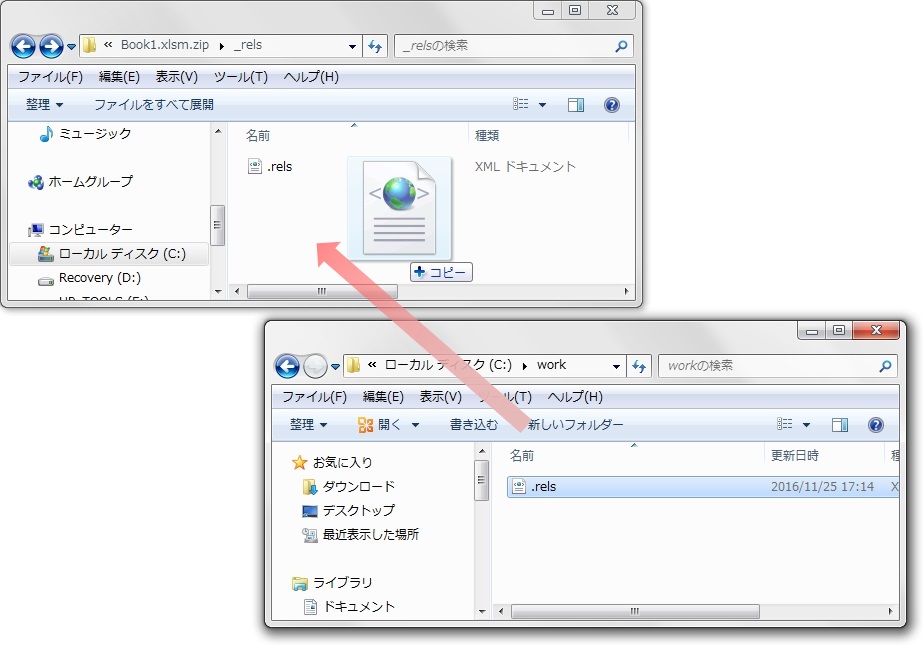
「customUI.xml」を作成する
1.「customUI.xml」作成
ワークフォルダに「customUI」フォルダを作成し、その配下に「customUI.xml」を作成。(右クリック、「新規作成(X)」-「テキスト ドキュメント」を選択し、リネーム。)

2.「customUI.xml」の編集
「customUI.xml」をテキストエディターで開き、下記内容で保存。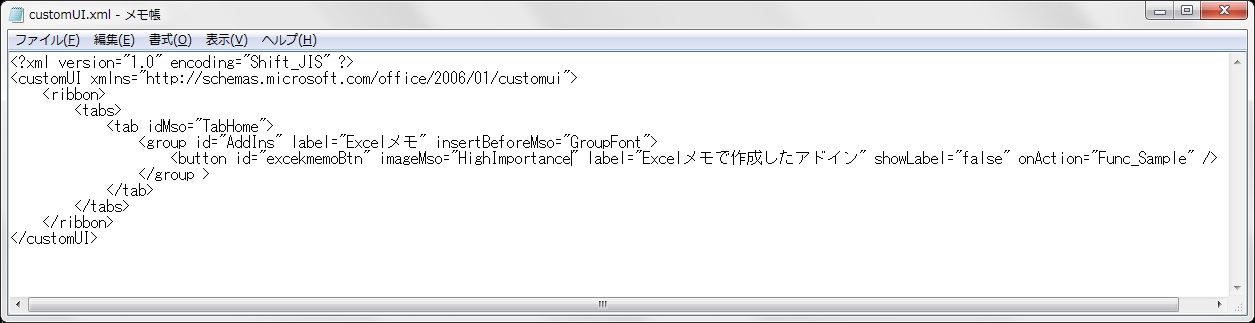
|
1 2 3 4 5 6 7 8 9 10 11 12 |
<?xml version="1.0" encoding="Shift_JIS" ?> <customUI xmlns="http://schemas.microsoft.com/office/2006/01/customui"> <ribbon> <tabs> <tab idMso="TabHome"> <group id="AddIns" label="Excelメモ" insertBeforeMso="GroupFont"> <button id="excekmemoBtn" imageMso="HighImportance" label="Excelメモで作成したアドイン" showLabel="false" onAction="Func_Sample" /> </group > </tab> </tabs> </ribbon> </customUI> |
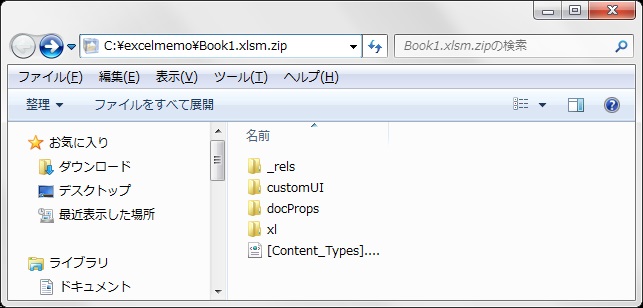
3.「customUI」フォルダ格納
「customUI」フォルダを「Book1.xlsm.zip」直下に格納。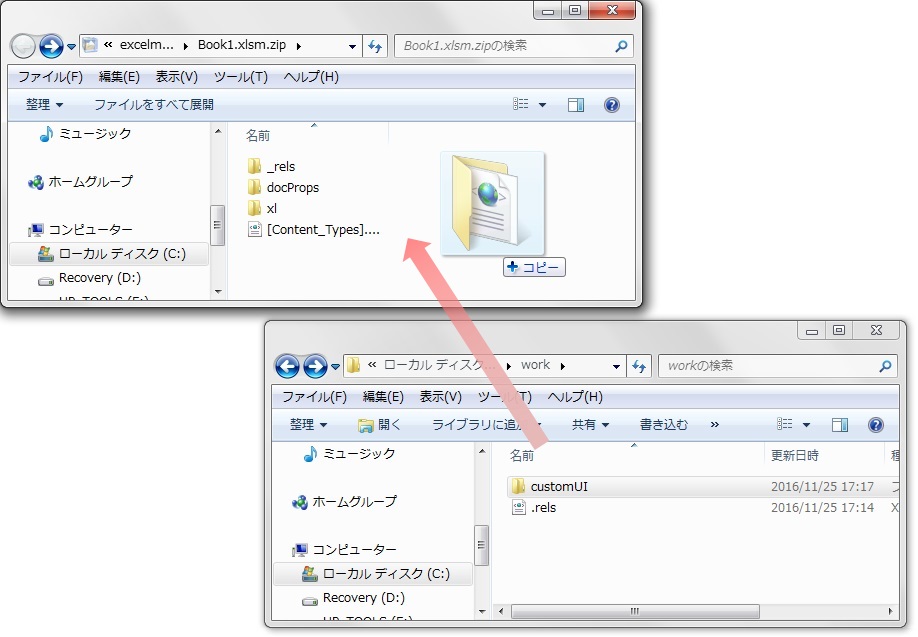
(以下のようなフォルダ構成になります。)
「Book1.xlsm.zip」をリネーム
「Book1.xlsm.zip」を「Book1.xlsm」へ戻す。
アドインとして保存
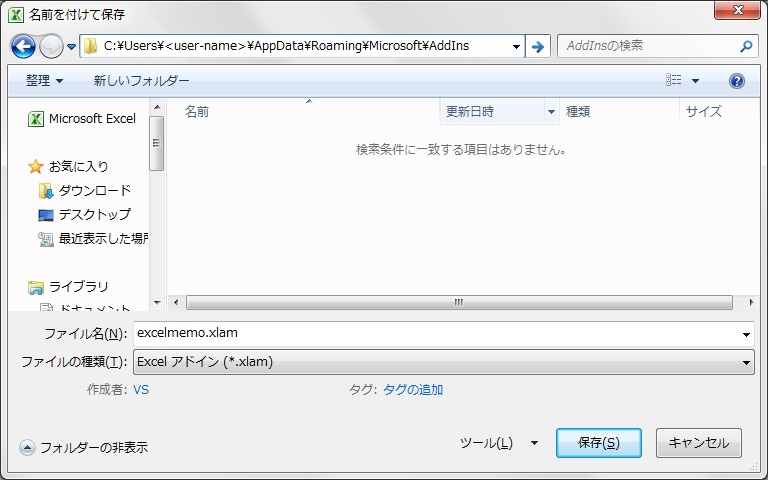
「Book1.xlsm」を開き、別名で保存する。
(ここでは「excelmemo.xlam」とする。)
保存場所:”C:\Users\<user-name>\AppData\Roaming\Microsoft\AddIns”直下
プログラムを実装する
1.「excelmemo.xlam」を開く
上記パスに保存した「excelmemo.xlam」を開く。2.プログラムを実装
標準モジュールを追加し、関数を記述する。(とりあえず簡単なコードを記載)
|
1 2 3 4 5 |
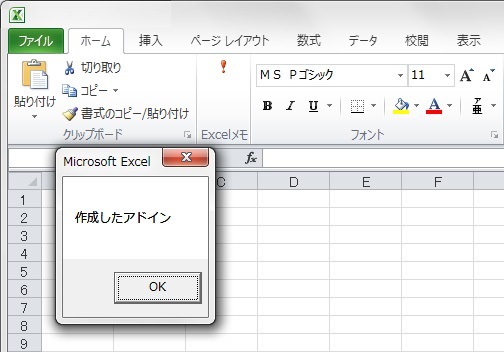
Sub Func_Sample(control As IRibbonControl) MsgBox "作成したアドイン" End Sub |
完成
結果、このようになります。